Lab 12 - Level design
1.5p for meeting all the requirements.
0.5p by making your level look interesting (subjective grading).
Probuilder tutorial video:
ProBuilder basics
Useful shortcuts:
- Hold Ctrl while moving to snap to grid.
- Hold Shift while moving faces to extrude.
- Alt-click on ProBuilder buttons to modify the custom settings.
- In texture edit mode, hold down ctrl and click on faces to snap them together
Steps:
- Create a new 3D project.
- Add graphics files:
- Download the following pixel art texture pack: https://subpixel-studios.itch.io/scifi-pixel-texture-pack
- Download and split explosion graphics: https://opengameart.org/content/pixel-explosion-12-frames
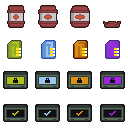
- Download and split game props:

- Create the initial room
- Add Probuilder package. Windows->Package Manager->All->ProBuilder
- Add ProGrids package from preview packages, cog symbol->Advanced Project Settings->Show preview packages (if it is is not there, then from the assets store).
- Create materials for 5 of the wall textures:
- use legacy shaders
- use point filtering
- don't generate mipmaps (will break some textures on farther distances)
- Create an initial room geometry, it is recommended to construct it from multiple meshes.
- Add materials to the room.
- Add point lights (disable their shadows to make them significantly faster)
- Match the texture scaling with the room by changing the tiling option under the material.
- Create explosion effect
- Download Standard Assets from the Package manager or from the Unity asset store.
- Import only Character, Utility and Cross Platform Input folders.
- If there are any errors, fix them by commenting out those lines.
- Add FPSController to the scene.
- Create explosive barrels
- Create an explosion particle system, with texture sheet animation (Sprites mode) and sprite material.
- Create a script for camera facing billboards (it should rotate only around y-axis). You can do it by modifying the sample code from here: http://wiki.unity3d.com/index.php/LookAtCameraYonly
- Create an explosive barrel prefab, with the camera facing script and custom barrel script
- Implement the barrel script. The barrel should start exploding when the player gets close.
- Extra: push the player away when barrel is exploding (use a function in Character Controller script).
- Continue editing your room geometry, eventually you should have at least 3 different connected rooms or corridors.
- Make your level interesting to run through. (0.5 points are given subjectively by how interesting your scene looks)
You will receive max points by just having 3 different rooms with a lot of explosive barrels. Implementing the collectible keys and doors that can be opened will give you 1 bonus point.
Submission
Build your level and submit the build.
12. Lab 12Sellele ülesandele ei saa enam lahendusi esitada.
