Lab 9 - Blender modeling and texturing
In this lab, we are making a low poly tree and texture it using texture first approach. If you are more experienced with the blender you can make a different (more complex) model and submit a picture of your tree.
Why to learn Blender video from Computer Graphics course:
A very good Blender tutorial for beginners:
Lab video:
All hotkeys used in this lab are shown here:

Steps:
- Create a new blender project and add a cylinder with 5 sides.
- Extrude the tree upwards. After every extrusion, rotate and scale the last face a bit.
- You can cut longer segments in half with the loop cut tool Ctrl+R. (Useful if you need squared faces for extruding branches)
- Continue extruding sides of your trunk to make branches.
- Add branches until your tree is detailed enough.
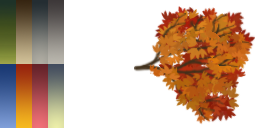
- Open UV layout in another view and load the following texture:

- Assign Material to your mesh, and give it a texture
-
- Choose textured rendering mode to see the texture.
- Unwrap your mesh
- Select an edge loop and unwrap it. Scale and place the selection to the corresponding color on your UV map.
- Continue unwrapping faces until they are all mapped to the texture.
- Create another object with a quad. Unwrap this quad to the branch.
- Duplicate the branch quad multiple times to cover the whole tree with branches.
Put your tree into Unity game engine
- Save the tree in *.blend file or export as *.fbx file
- Add this file to Unity
- Add the TreeTex texture file to unity
- Drag this object to the scene
- Create a new material using the TreeTex texture
- Use a two sided shader on your material for the leaves, you can find one from here: https://gist.github.com/cortvi/094f5233be6db0492b386cb494aa709a
- Add the material to your tree and configure the ambient lighting to make it well lit.
Submission
Make a screenshot about your finished tree in Unity and submit this picture. (PNG file only, Do not include the Blender files)
9. Lab 9Solutions for this task can no longer be submitted.
