Lab 9 - Blender modeling and texturing
In this lab, we are making a low poly tree and texture it using texture first approach. If you are more experienced with the blender you can make a different (more complex) model and submit a picture of your tree.
Why to learn Blender video from Computer Graphics course:
A very good Blender tutorial for beginners:
Lab video:
All hotkeys used in this lab are shown here:

Steps:
- Create a new blender project and add a cylinder with 5 sides.
- Extrude the tree upwards. After every extrusion, rotate and scale the last face a bit.
- You can cut longer segments in half with the loop cut tool Ctrl+R. (Useful if you need squared faces for extruding branches)
- Continue extruding sides of your trunk to make branches.
- Add branches until your tree is detailed enough.
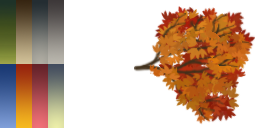
- Open UV layout in another view and load the following texture:

- Assign Material to your mesh, and give it a texture
-
- Choose textured rendering mode to see the texture.
- Unwrap your mesh
- Select an edge loop and unwrap it. Scale and place the selection to the corresponding color on your UV map.
- Continue unwrapping faces until they are all mapped to the texture.
- Create another object with a quad. Unwrap this quad to the branch.
- Duplicate the branch quad multiple times to cover the whole tree with branches.
Put your tree into Unity game engine
- Save the tree in *.blend file or export as *.fbx file
- Add this file to Unity
- Add the TreeTex texture file to unity
- Drag this object to the scene
- Create a new material using the TreeTex texture
- Use a two sided shader on your material for the leaves, you can find one from here: https://gist.github.com/cortvi/094f5233be6db0492b386cb494aa709a
- Add the material to your tree and configure the ambient lighting to make it well lit.
Submission
Make a screenshot about your finished tree in Unity and submit this picture. (PNG file only, Do not include the Blender files)
9. Lab 9Sellele ülesandele ei saa enam lahendusi esitada.
