Homework for Week 12
After this week you can
- Create simple graphical user interfaces for your program
- Make the user interface react to the user's activity
- Draw on the canvas
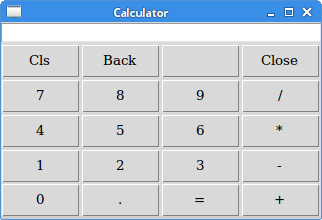
GUI in Python, using Tkinter
Python provides a variety of packages for developing graphical user interfaces (GUIs). The most common of them is Tkinter, which belongs to any Python distribution. Tkinter is a standard Python interface in the Tk GUI toolkit. In other words, Tkinter is an open-source, portable GUI library designed for use in Python scripts. In conjunction with Tkinter, Python provides a fast and easy way to create GUI applications (screenshot).
To use Tkinter, we need to perform the following steps:
- import the tkinter module
- create the main window of the application
- add one or more widgets to the application
- enter the main loop, which waits for events (e.g., clicking a button, pressing a key, an operating system asking to quit an application, etc.) and handle them accordingly
Example
from tkinter import *
window = Tk()
# Widgets will be added here later...
window.mainloop()
This program creates the application window:

Widgets
Tkinter has a large number of useful widgets. These are standard graphical user interface (GUI) elements, such as buttons, labels, and text boxes, used in a GUI application. A complete list of widgets and their descriptions can be found here.
The following program demonstrates some basic Tk widgets:
from tkinter import *
from tkinter import messagebox

# This function is executed if the button is pressed
def sayHello():
    say = "Hello " + name.get()
    messagebox.showinfo(message=say)

# Define the size and the title of the window
window = Tk()
window.title("Say Hello")
window.geometry("300x100")

# Label
labelName = Label(window, text="Name")
labelName.place(x=5, y=5)

# Text box
name = Entry(window)
name.place(x=70, y=5, width=150)

# Button; function sayHello is associated with a button
but = Button(window, text="Say Hello!", command=sayHello)
but.place(x=70, y=40, width=150)

# Enter the main event loop
window.mainloop()
If you run the program, you will see a small window containing a text box and a button. Once the text is entered and the button is clicked on, a greeting is displayed.

Pay attention to the place() method. This method sets the coordinates of the widget (units are pixels). Unlike the coordinate system in the Turtle module, the point (0,0) is located in the upper left corner of the window, and the coordinates increase to the right and down.

More widgets can be found in the Tk tutorial.
Canvas
One of the most exciting Tk widgets is a canvas. The canvas is a rectangular area intended for drawing pictures or other complex layouts. You can place graphics, pictures, text, etc., on the canvas. The following program demonstrates some possibilities how to use the canvas:
from tkinter import *
from tkinter import font  # we can change the font of the text

window = Tk()
window.title("Canvas")
area = Canvas(window, width=600, height=600, background="white")
area.grid()  # this geometry manager organizes widgets into a table-like structure

# one line (x0, y0, x1, y1)
area.create_line(30, 40, 300, 40)

# several lines (any number of coordinate pairs)
area.create_line(30,60,  300,60,  300,100,  60,100)

# change the width and color of the lines
area.create_line(30, 130, 300, 130, width=4, fill="red")

# different line style
area.create_line(30, 150, 300, 150, width=5, dash=(5, 1, 2, 1), arrow=LAST)

# dash lines: connect the endpoints and color the content
# colors can also be set in rgb
# check http://www.colorpicker.com/
area.create_polygon(30,160,  300,160,  300,200,  60,200, fill="#95BD9D")

# rectangle
area.create_rectangle(30,260,  300,300)

# oval
area.create_oval(30,260,  300,300, width=2, outline="blue", fill="wheat")

# try to move the mouse over this oval
area.create_oval(330, 330, 400, 400, fill="gray", activefill="pink")

# if you want to choose a font for the text, first create the font
big_font = font.Font(family='Helvetica', size=32, weight='bold')
area.create_text(30, 500, text="Mercury", font=big_font, anchor=NW)

window.mainloop()
Processing user events
When the program enters the main loop, it starts waiting for events. An event is, for example, a mouseclick, pressing a key, etc. You can find a list of the most common event types here. When an event occurs, Python generates an event object containing information about the event, such as its type, coordinates on the screen, target widget, etc.
To react to the events, we need to define specific functions, called event handlers, that perform the required activities in response to the events. Each of these functions must be associated or bound to the widget that should have that capability. Each widget can have its own set of event handlers, or the same event handler can be associated with different widgets.
For example, let's write a program that converts the values from bytes to kilobytes and back. The user can enter a value in either of the boxes, and the content of the other box is updated accordingly.

We start with creating the application window and the text entry fields in a usual way:
window = Tk()
window.title("Convert")
window.geometry("210x110")

bytefield = Entry(window)
bytefield.place(x=20, y=20, width=60)
bytelabel = Label(window, text="B =")
bytelabel.place(x=84, y=20)
kbytefield = Entry(window)
kbytefield.place(x=112, y=20, width=60)
kbytelabel = Label(window, text="KB")
kbytelabel.place(x=176, y=20)
A text entry field allows the user to enter values using the keyboard, i.e., generate keystroke events. To process the events, we define a function that, depending on the event target, converts the field's current value to the correct units and replaces the content of the other field with the result.
def process(event):
    n = event.widget.get()
    try:
        n = float(n)
    except:
        n = 0
    if event.widget == bytefield:
        kbytefield.delete(0, 'end')
        kbytefield.insert(0, round(n/1024, 3))
    elif event.widget == kbytefield:
        bytefield.delete(0, 'end')
        bytefield.insert(0, round(n*1024))
Now we need to bind the function with the widget. In our case, we can bind the function process() with both of the entry fields since the function itself determines the target of the event:
bytefield.bind("<KeyRelease>", process)
kbytefield.bind("<KeyRelease>", process)
We also define a function to reset the fields and create the reset button, binding the function to it.
def reset():
    bytefield.delete(0, 'end')
    kbytefield.delete(0, 'end')

resetbutton = Button(window, text="Reset", command=reset)
resetbutton.place(x=65, y=60, width=80)
Note that here we use another way of binding by specifying which command should be executed when the button is clicked.
Finally, the program enters the main loop and starts waiting for user activities.
window.mainloop()
Here, you can download the complete program.
More examples
Look here at more examples with Tkinter.
If you would like to get more information about Tkinter, check the following links:
Quiz
Go to Moodle and solve the quiz.
Examples
Flag
The following program displays a window called "Flag". The program draws (using Tkinter and its widget – canvas) the flag of Sillamäe.
from tkinter import *

window = Tk()
window.title("Flag")
area = Canvas(window, width=880, height = 560)

area.create_rectangle(0, 0, 880, 560, fill="blue", outline="blue")

for i in range(5):
    area.create_rectangle(0+i*80, 560-3*70-i*70, 2*80+i*80, 560-i*70, fill="yellow", outline="yellow")
    area.create_rectangle(880-2*80-i*80, 560-3*70-i*70, 880-i*80, 560-i*70, fill="yellow", outline="yellow")

area.create_rectangle(880-6*80, 0, 880-5*80, 70, fill="yellow", outline="yellow")

area.pack()
window.mainloop()
This is a simple drawing program without user input.
Exercises
1. Login page
Write a program that uses Tkinter to create a login screen with text fields for username and password and two buttons:

The user enters a username and a password and clicks the "Login" button. If the username and password are correct, then the program displays a message box with an approving message. If they are incorrect, then the program informs the user about that. Correct username and password can be written into the program. If the user clicks the "Clear" button, then both text boxes are cleared.
2. Draw a house
Write a program that uses Tkinter and its widget canvas to draw a picture of a house in the window with white background. The title of the window has to be "House".
Submit your solutions
Go to Moodle and upload your solutions under homework for Week 12 (home1.py and home2.py). Note that the autotester doesn't check the output image.